- Category: Props
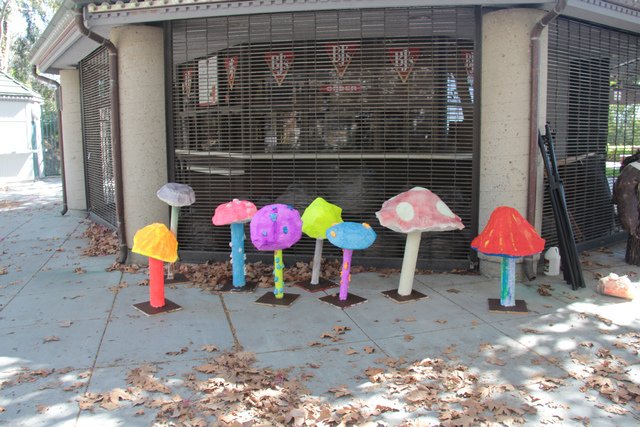
For this project, we are making giant mushrooms.
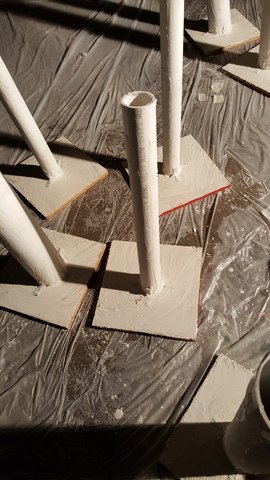
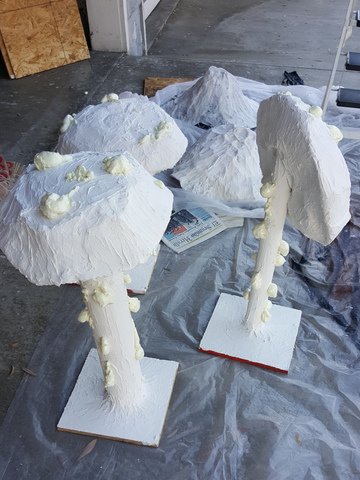
I choose to make the base of the mushroom out of OSB wood cut into 1 foot squares various sizes of PVC pipe anchored to those for the stems. The tops are a mash of various paper mache, chicken wire and hardware cloth, aluminum pans, joint compound and paints, and even a dash of expanding foam.
To get a variety of mushroom sizes, I chose to use a couple different sizes of PVC pipe, cut at various lengths and even some smaller 8 inch concrete tubes.
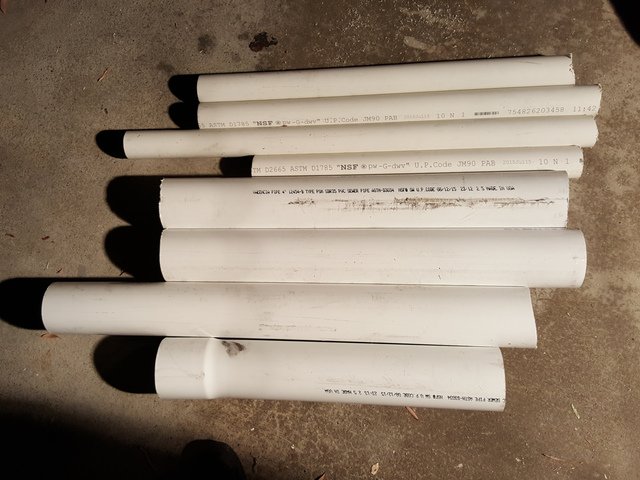
I started by screwing the PVC into some 1 foot square OSB wood.
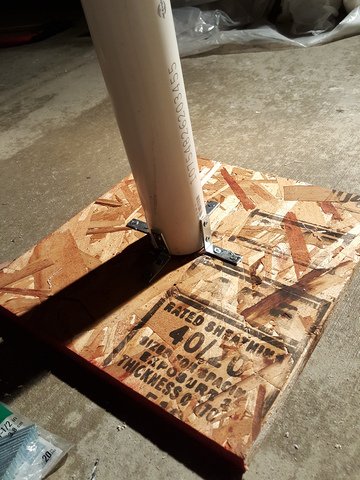
and then adding joint compound to the base to give strength and to hide the hardware.
The next step was using either chicken wire or hardware clother, or roasting pans from the dollar store, to make the mushroom heads, then paper macheing over those, covering them in joint compound
To give them a little more texture, some spray foam was added to look like growths along the stems and the heads.
And then finally they were painted various colours.
Some of the heads were too heavy and flopped over during drying, which added more to the variety.
- Category: Props
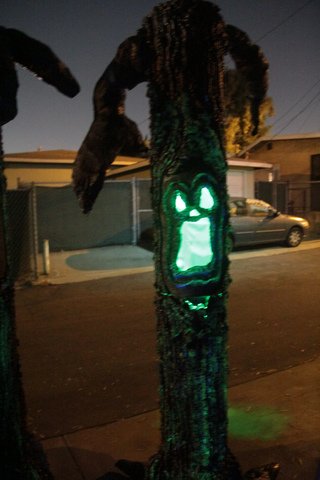
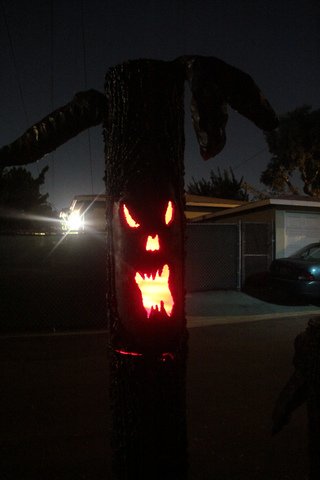
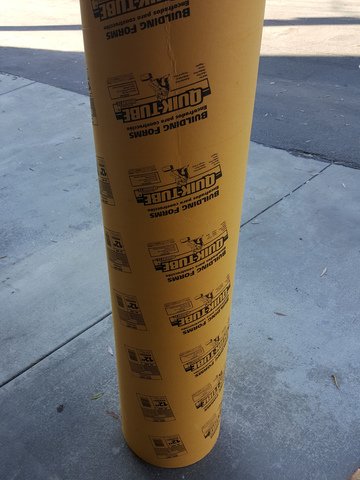
In honour of the fairytale theme we are doing this year, Madison and I decided to do a "woodland fairies" theme for our section. I found some stuff on pinterest for making trees. I liked a couple of the ideas that used concrete tubes.
So with that in mind, i was off to the local hardware store to buy a few concrete tubes
These things come in a standard 4 foot tall size. They vary in diameter from 8 inches up to 16 inches. They didn't have the 16 inches, so i decided 12 inches would be good enough. The only catch is that the diameter is not exact on every tube, and can vary up to half an inch bigger or smaller. So i had to find tubes that were as close to the same diameter as possible so that we could stand them up on top of each other to make an 8 foot tall tree.
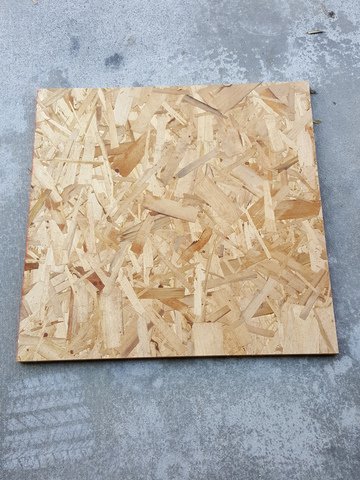
We knew we had to make these things solid enough to stand on their own, so I also bought some OSB wood and had them cut down to 2 feet square
This gave use a nice solid base to attach the tubes. For added stability, I put 1 inch X 1/2 inch studs that would get screwed to the base and screwed to some L-brackets

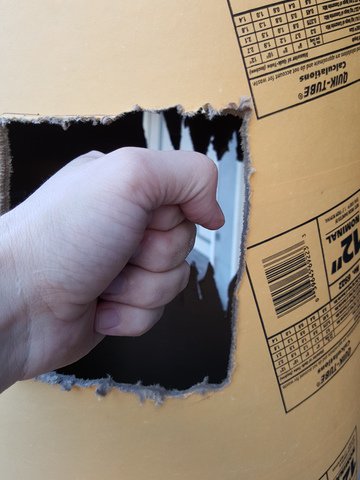
The next step involved cutting some holes in the backs of the tops and bottoms for access inside to hang lights, tighten bolts and run wires. These didnt need to be too large, just a little bit bigger than my fist was perfect.
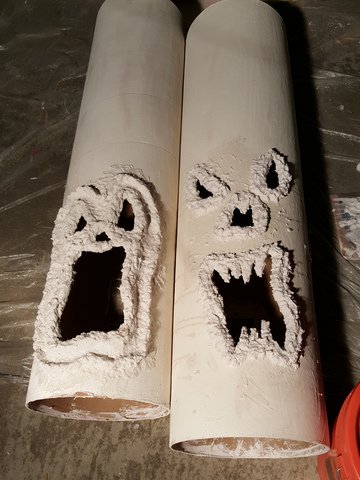
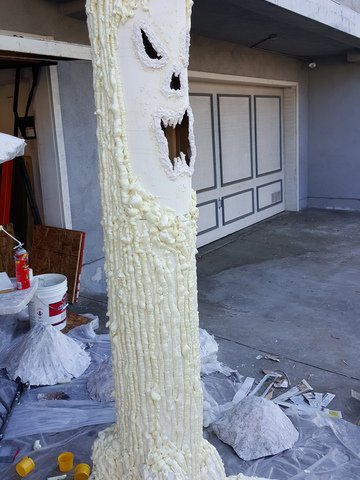
finally we cut out the scary faces for each of them using a dremel.

once this was all done, we used joint compound over the entire tree, top to bottom, to give it more strength and to eventually give it a surface to be able to sand, paint, and spray foam.
once we completed that step, we made some homemade paper mache clay using white glue, water, joint compound and toilet paper. and built up the features of each face to give it more character
this concoction took several days to dry, but it was worth. it came out nice and stiff once it was completely dry and we thought it looked great.
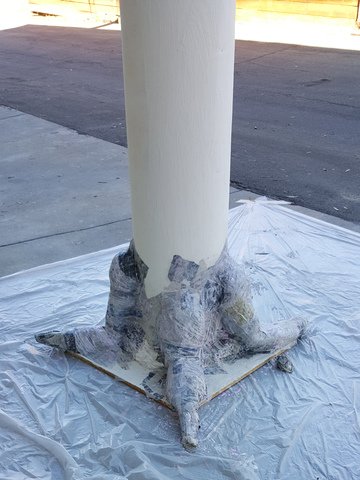
the next step was to build the roots. we did that by shaping newspaper into roots and then taping and paper macheing it to the trunks.
The next steps will be spray it with expanding foam in vertical lines from top to bottom to give it a bark-look.
after that we will spray paint it flat black, then dry brush a light brown over that. and finally dry brush glow-in-the-dark paint around portions of the face and trunks to give highlight.
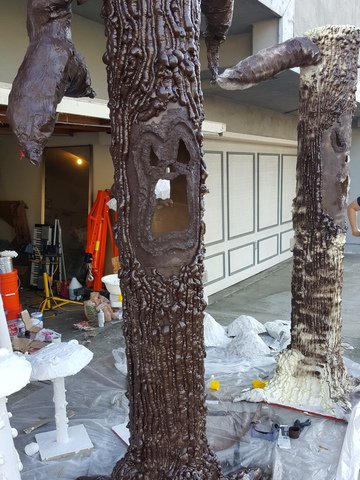
The branches were done using chicken wire and paper mache.
Finally CFL lights were placed inside